

Data Sources for Analytics
This page includes the following sections:
- Overview
- Method 1 - Add Single Data Source with Dialog
- Method 2 - Add Multiple Data Source with Text File
- General Notes
Overview
There are two methods of specifying data sources for analytics.
For day to day adding/removing of data sources, method 1 is simpler and easier. If you need to import a long list of data sources, method 2 may be preferable.
Method 1 - Add Single Data Source with Dialog
Click the Add Data Source button to display the following dialog.
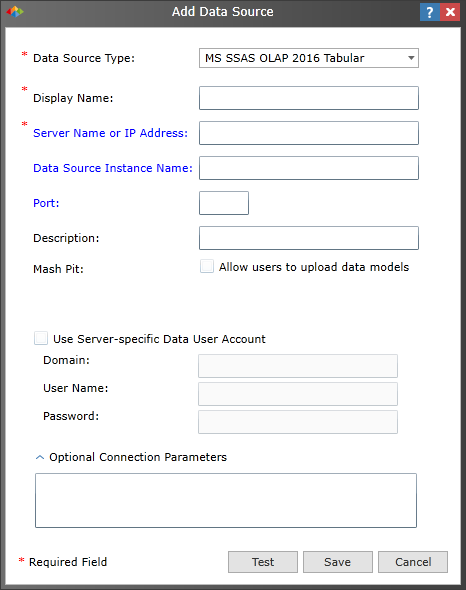
Data Source Type
The following source types are available:
- PowerPivot for SharePoint
- MS SSAS OLAP 2005
- MS SSAS OLAP 2008
- MS SSAS OLAP 2012
- MS SSAS OLAP 2012 Tabular
- MS SSAS OLAP 2014
- MS SSAS OLAP 2014 Tabular
- MS SSAS OLAP 2016
- MS SSAS OLAP 2016 Tabular
Display Name
The name of the data source (as it will appear in BI Office).
Server Name or IP Address
One or the other (not both).
Data Source Instance Name
Instance name on the data source.
Port
If left blank, system will use the default port.
IMPORTANT: Insert the Data Source Instance Name or the Port, but not both.
Description
Brief description of the data source (as it will appear in BI Office).
Mash Pit (Allow users to upload data models)
This field appears for tabular type only.
Use Server-Specific Data User Account
This option allows you to specify a "Datasource User" for a specific server. Once you check this option and specify here a domain, user name and password, the global datasource user will no longer have access to the server.
- Domain
- User Name
- Password
Optional Parameters
This box can be used to enter connection string properties.
Method 2 - Add Multiple Data Source with Text File
Use this method to add multiple data sources using a text file.
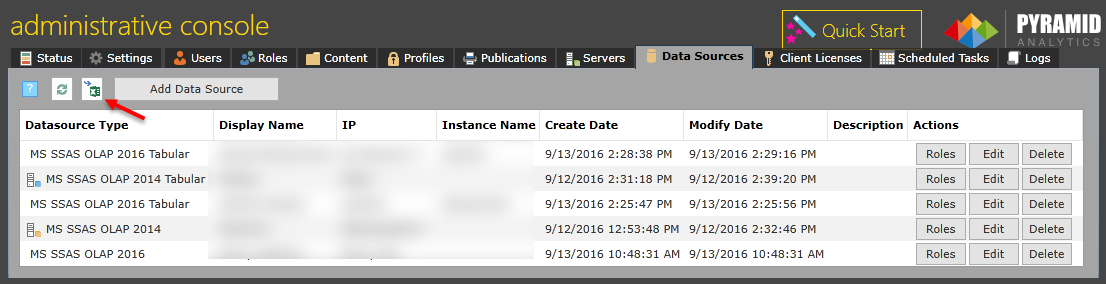
Step 1
Click the Import button (see red arrow below).
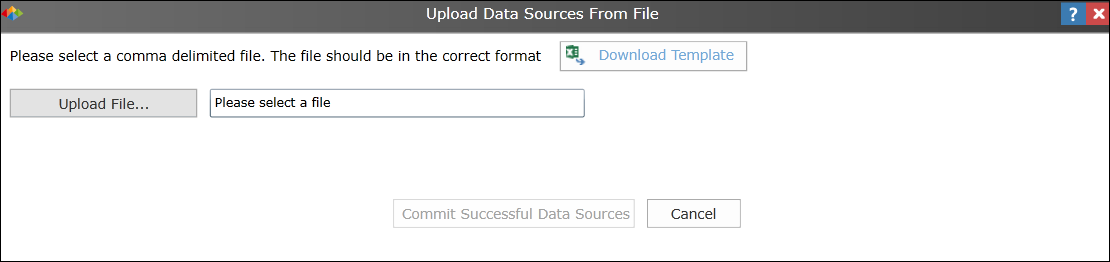
Step 2
Click on the Download Template button to save the file to your hard disk.
Step 3
Fill in the template with the appropriate values. Each row represents a single data source.
NOTE: For detailed field descriptions, see Method 1 - Add Single Data Source with Dialog.

Data Source Type
Use the following numbers below to indicate the data source.
| Data Source Type | Number |
|---|---|
| MS OLAP 2005 | 0 |
| MS OLAP 2008 | 1 |
| POWERPIVOT 2010 | 2 |
| MS OLAP 2012 | 3 |
| MS OLAP 2012 TABULAR | 4 |
| MS OLAP 2014 | 5 |
| MS OLAP 2014 TABULAR | 6 |
MashPit
| MashPit Status | Number |
|---|---|
| FALSE (default) | 0 |
| TRUE | 1 |
Roles
Use a semicolon between roles. For example: Role1;Role2
Step 4
Save file as a comma delimited file.
Step 5
Click Upload File and browse to correct file name. The system will begin process and validate the input:
GREEN - successful
RED - failure
Step 6
Click "Commit Successful Data Sources to complete the process.
General Notes
Assigning Roles
After adding a new data source, you are required to assign roles to make the data source accessible to your end users.
Active Directory
If your data source server is separate from the other parts of your application, it is important to ensure that the environment is running within an Active Directory.
Allow Users to Upload Data Models
For tabular data sources only, you may OPTIONALLY allow users to upload data models for working in Data Modeling (MashPit).
Home |
Table of Contents |
Index |
User Community
Pyramid Analytics © 2011-2022